
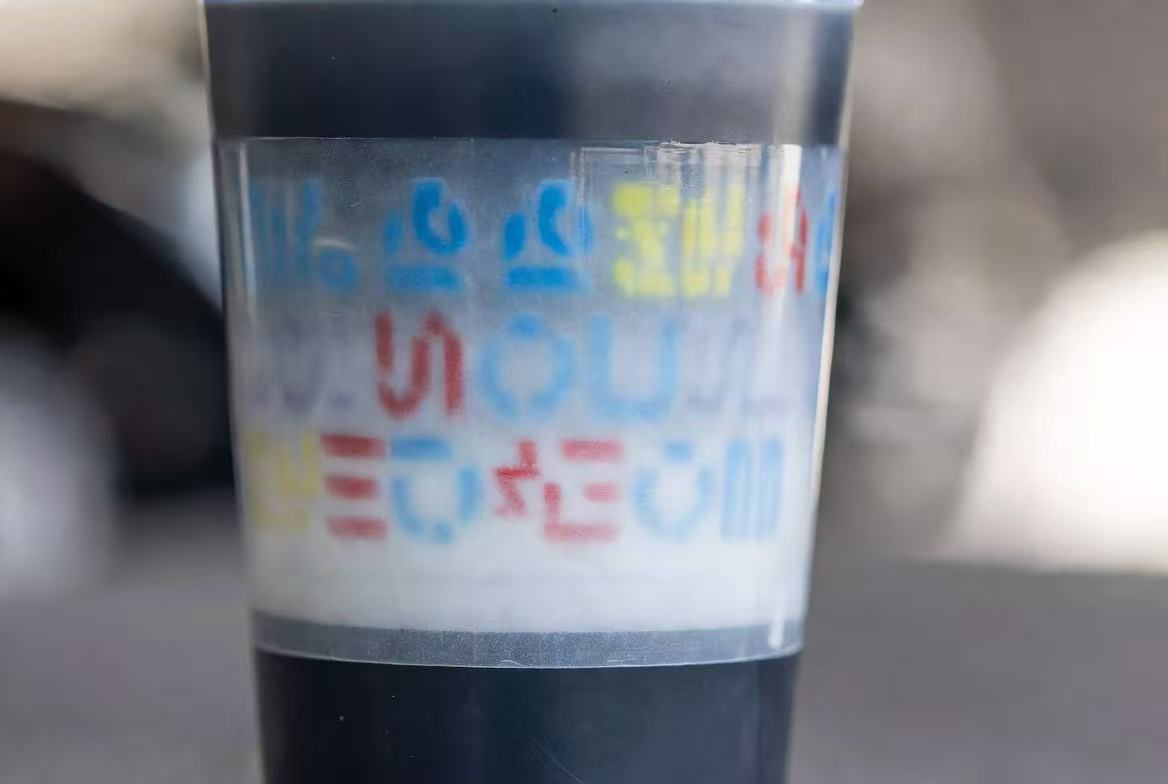
You print a design meant to pop against a black tumbler, apply the transfer, and the dark background bleeds right through — colors look muddy, whites look gray, and the whole design reads flat instead of vibrant. If you're dealing with UV DTF white ink not opaque enough to fully block a dark surface, the instinct is usually to blame the ink itself. Sometimes that's right. More often, the real issue is how the white layer is set up in your RIP software, not the ink in the bottle.
This guide walks through a simple test to confirm whether opacity is actually the problem, compares the layer order options available to you, breaks down the three most common causes of weak coverage, and shows you how to set up a double white layer correctly when a single pass isn't enough.
The See-Through Test: How to Check If Your White Layer Is Thick Enough
Before adjusting any RIP settings, run this quick physical test — it takes less than a minute and tells you immediately whether you're dealing with an opacity problem or something else (like a color profile or curing issue).
- Hold the printed transfer (before or after application) up to a bright phone flashlight, positioned directly behind the print.
- Look for light bleeding through the white areas. If you can see the flashlight glow clearly through the white underbase, the layer isn't opaque enough to fully block a dark surface underneath.
- Compare against a known-good sample, if you have one, using the same flashlight test — this gives you a real reference point rather than guessing at what "opaque enough" looks like.
- Check corners and fine detail areas specifically, not just large solid fills. Thin lines, small text, and edges are often where opacity fails first, even when large white blocks look fine.
If light clearly passes through, you've confirmed UV DTF colors look dull on black background because of a genuine coverage gap — the fix is in your layer setup or ink, not your color profile or curing settings.
Print Layer Order Comparison Table
UV DTF transfers are printed in reverse, so the order layers are printed in directly determines which layer ends up facing outward and which ends up against the substrate. Each order below suits a different use case.
| Layer Order | Best Suited Background | Opacity Result | Ink Consumption |
|---|---|---|---|
| CMYK → White → Varnish (standard order) | Light to medium-dark backgrounds | Good general-purpose opacity; may show slight see-through on true black or very dark surfaces | Standard/baseline |
| White → CMYK → Varnish (reversed order) | Specialty/translucent effects, light backgrounds | Weaker opacity against dark surfaces — not recommended as a primary fix for dark-tumbler work | Standard/baseline |
| Double White Layer (two full white passes within the CMYK-White-Varnish sequence) | Black and very dark backgrounds | Strongest opacity — reliably blocks dark substrates underneath | Higher (roughly 1.5–2x the white ink of a single pass) |
For most dark tumbler, dark apparel-adjacent, or black-background work, the standard CMYK → White → Varnish order with a single white pass is a reasonable starting point — but if your see-through test shows light bleeding through, moving to a double white layer is the most reliable fix, ahead of raising ink density or slowing print speed alone.
3 Causes of Weak Opacity
RIP Software White Layer Not Enabled or Set Too Low
Most RIP software treats the white channel as a separate, adjustable layer — with settings for whether it's enabled at all, what percentage of the design it covers, and how much ink density is applied. It's common for a shop to have the white layer technically turned on but set to a low density percentage, either from a previous job's settings or a default that was never adjusted for dark-substrate work. Before touching anything else, confirm your RIP's white ink settings are set to full coverage and adequate density for the specific job.
White Ink Itself Lacks Opacity (High Filler Content)
Not all white UV DTF ink is formulated the same way. Titanium dioxide (TiO₂) is the pigment responsible for opacity, and it's also one of the more expensive raw materials in the formula. Lower-cost white inks sometimes reduce TiO₂ concentration and increase filler or extender content to cut cost — the ink still looks white in the bottle and prints fine on light backgrounds, but it simply can't achieve the same opacity on dark substrates no matter how the layers are configured. If you've confirmed your RIP settings are correct and you're still failing the see-through test, the ink formula itself is the likely culprit.
Print Speed Too Fast, Insufficient Ink Laid Down
Faster print speeds mean less time for the printhead to deposit ink per pass, which directly reduces the amount of white ink laid down per unit area — even with white fully enabled in your RIP. Production pressure often pushes shops toward faster speeds without adjusting for the extra ink density that darker or higher-opacity jobs require. If speed was recently increased to boost throughput, that's worth testing as a variable before concluding the ink itself is at fault.
How to Set Up a Double White Layer in Your RIP Software
The exact menu layout varies between RIP software (PhotoPrint, Maintop, and similar programs all handle this slightly differently), but the underlying steps are consistent across most platforms:
- Open your print job's color/ink channel settings and locate the white ink layer controls, usually found alongside your CMYK channel settings.
- Duplicate or enable a second white pass within the print sequence — most RIP software has a dedicated "double white" or "white x2" option, or allows you to manually add a second white layer in the print order.
- Set both white passes to full density, rather than splitting density between the two passes — the goal is two full-strength layers, not one layer spread across two passes.
- Confirm the layer order remains CMYK → White (x2) → Varnish, so both white passes sit correctly between the color layer and the substrate once transferred.
- Run a test print on your actual dark substrate, not just a proof on white paper — opacity issues often aren't visible until tested against the real dark background.
- Re-run the see-through flashlight test on the finished sample to confirm the double layer resolved the issue before committing to a full production run.
- Save the setting as a dedicated dark-substrate preset, so you're not reconfiguring white layers manually every time a dark-background job comes in.
Premium UV DTF Ink — Built for True Opacity
A double white layer can compensate for a lot, but it can't fully make up for an ink formula that was never built for strong opacity in the first place. Starting with a high-opacity white ink means you need fewer white passes to hit full coverage — saving ink cost and print time on every dark-background job.
SHL Premium UV DTF Ink — CMYK + White + Varnish, 1000ml Set
- Full 6-bottle set: Cyan, Magenta, Yellow, Black, White, and Varnish (clear/gloss) — a complete, color-accurate system for dark and light substrates alike
- High-opacity white formula designed to block dark backgrounds with fewer passes
- Waterproof, scratch- and UV-fade resistant once fully cured — built for drinkware and outdoor use
- Compatible with Epson XP600, i3200U1, TX800, and DX5/DX7 printhead families
- 7-day money-back guarantee
Pairing a genuinely high-opacity white with the correct layer order is what actually solves see-through prints on dark tumblers — a double white pass fixes the symptom, but starting with better ink reduces how often you need it.
Order Locally, Get Support Locally
Because we stock and ship ink from our own facility, you're not waiting weeks on a formula that crossed an ocean before you can even start testing opacity against your own dark substrates — and if a batch doesn't perform the way it's supposed to, you're talking directly to the people who made it, not a reseller.
SHL LA Supply — 12155 Mora Dr, Santa Fe Springs, CA 90670
Phone: 562-203-5165 | Email: info@shl-supply.com
Hours: Monday–Friday, 9:00am–5:00pm (PT)
Shipping: Orders ship within 48 hours; free shipping on orders over $799; local pickup available at our Santa Fe Springs location
After-Sales: Backed by our money-back guarantee — report any defect within 5 days of receipt for a free replacement or return, no 15–35% restocking fee applied to defective items
FAQ
How much does a double white layer add to ink cost?
Expect roughly 1.5–2x the white ink consumption compared to a single pass, since you're printing two full-density white layers instead of one. In practice, this is a small fraction of total job cost for most dark-substrate work, and far cheaper than reprinting a job that fails the opacity test after it's already been applied to the product.
Do white ink and color ink need to be shaken separately?
Yes. White ink settles significantly faster than CMYK ink because of its heavier titanium dioxide pigment, so it needs a more thorough and more frequent shake — daily, at minimum, before production. CMYK inks can typically be shaken weekly or after longer idle periods. Treating white ink with the same shake schedule as your color channels is a common reason opacity and consistency issues show up even when the ink formula itself is fine.
Is a white underbase always necessary for dark backgrounds?
For any design meant to show true, accurate color on a dark or black substrate, yes — without an opaque white layer underneath, the dark background will mix with and dull your CMYK colors, regardless of how vibrant they look on-screen or on a light-colored proof. The only exception is when you're intentionally designing for a translucent or blended look where the dark background showing through is part of the desired effect.
Dealing with clogged nozzles on top of opacity issues? Read our companion guide, UV DTF Ink Clogging Your Printhead? Storage, Shaking & Viscosity Fixes, for the full shake routine and cleaning steps that keep white ink flowing at full density.

Leave a comment
This site is protected by hCaptcha and the hCaptcha Privacy Policy and Terms of Service apply.