
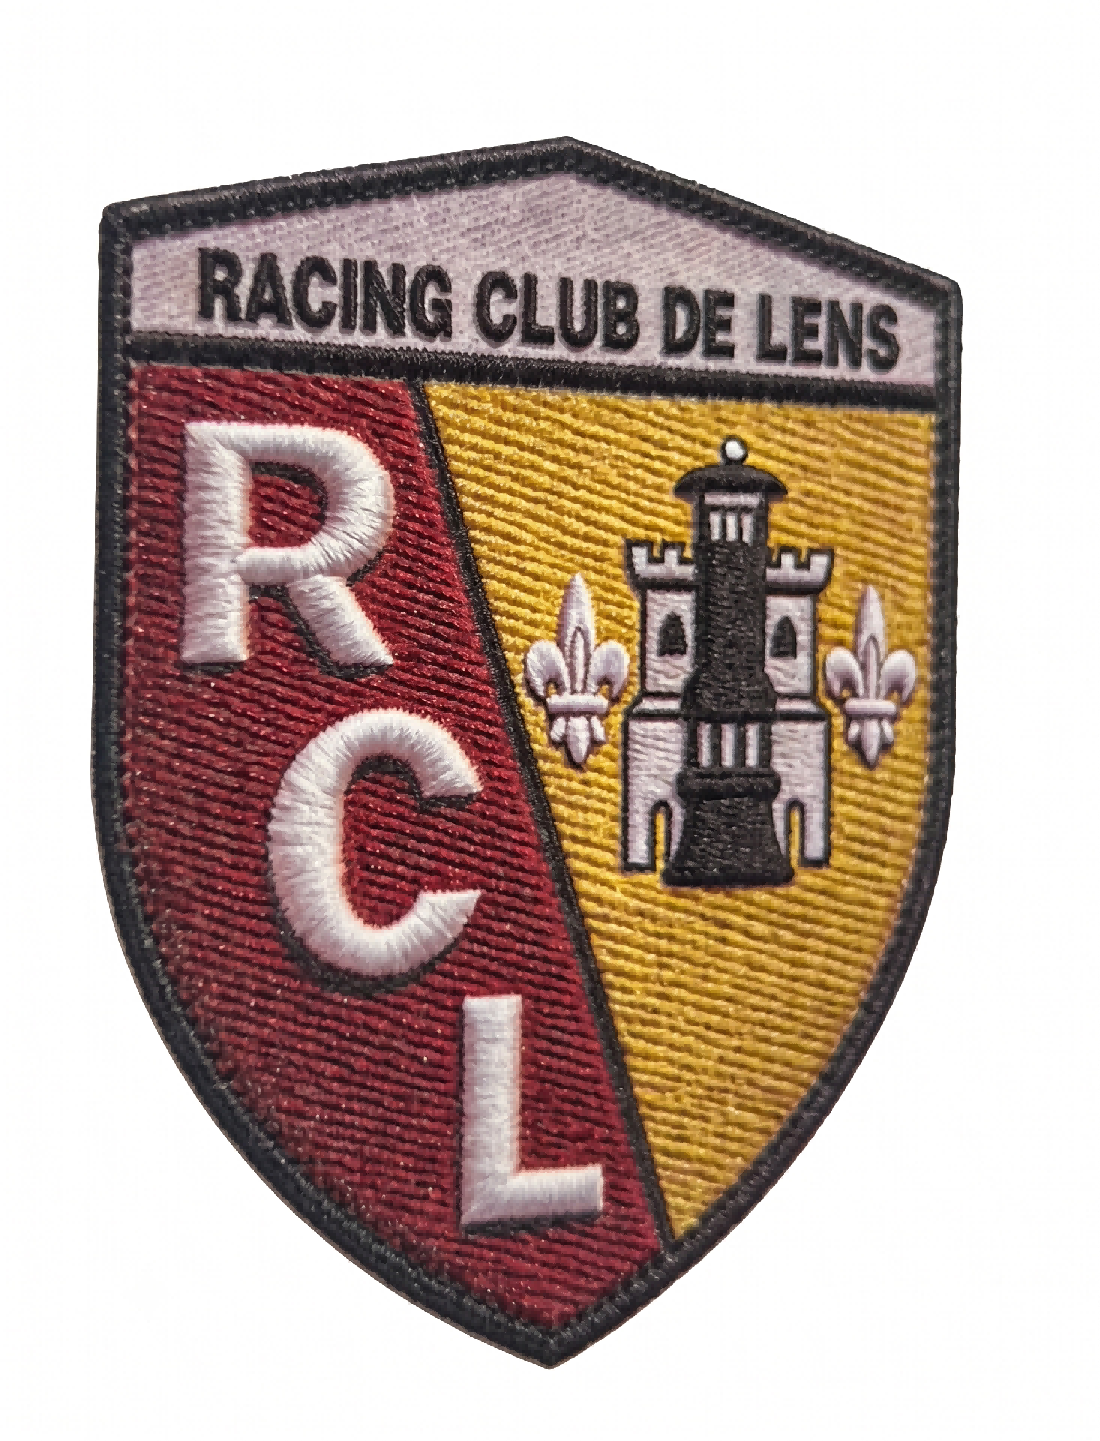
How to Make TPU Embroidery: The Complete Production Guide
If you've read the rest of this series, you already know what TPU embroidery is, why it holds up, and how it compares to stitched embroidery. This guide is the hands-on part: exactly what equipment you need and the step-by-step process to go from a flat design file to a finished, raised TPU embroidery patch. Whether you're adding this to an existing UV DTF setup or starting from zero, this is the practical checklist.
Two groups tend to land on this page: shops that already run UV DTF or DTF equipment and want to add TPU embroidery as a new product line, and people evaluating whether it's worth buying into the equipment at all. Both questions get answered the same way—by walking through exactly what's needed and exactly how the process runs, so you can judge the investment against your own order volume rather than a vague sense of "this seems complicated."
What You Need Before You Start: The Three-Piece Setup
Every TPU embroidery workflow comes down to three components working together. Get any one of them wrong—an ink that isn't formulated for layering, a film that's too thin to hold texture—and the raised, embroidered look won't form correctly. Here's what each piece of TPU embroidery equipment does, and roughly what it costs to get set up.
For a rough budget sense: the printer is the largest one-time investment, while ink and film are ongoing consumables priced per liter and per roll or sheet pack, similar to how you'd already be budgeting for DTF or UV DTF supplies. If you already own a compatible UV DTF printer, the practical entry cost is really just the ink and a sample pack of film.
1. A UV DTF Printer That Can Layer White Ink
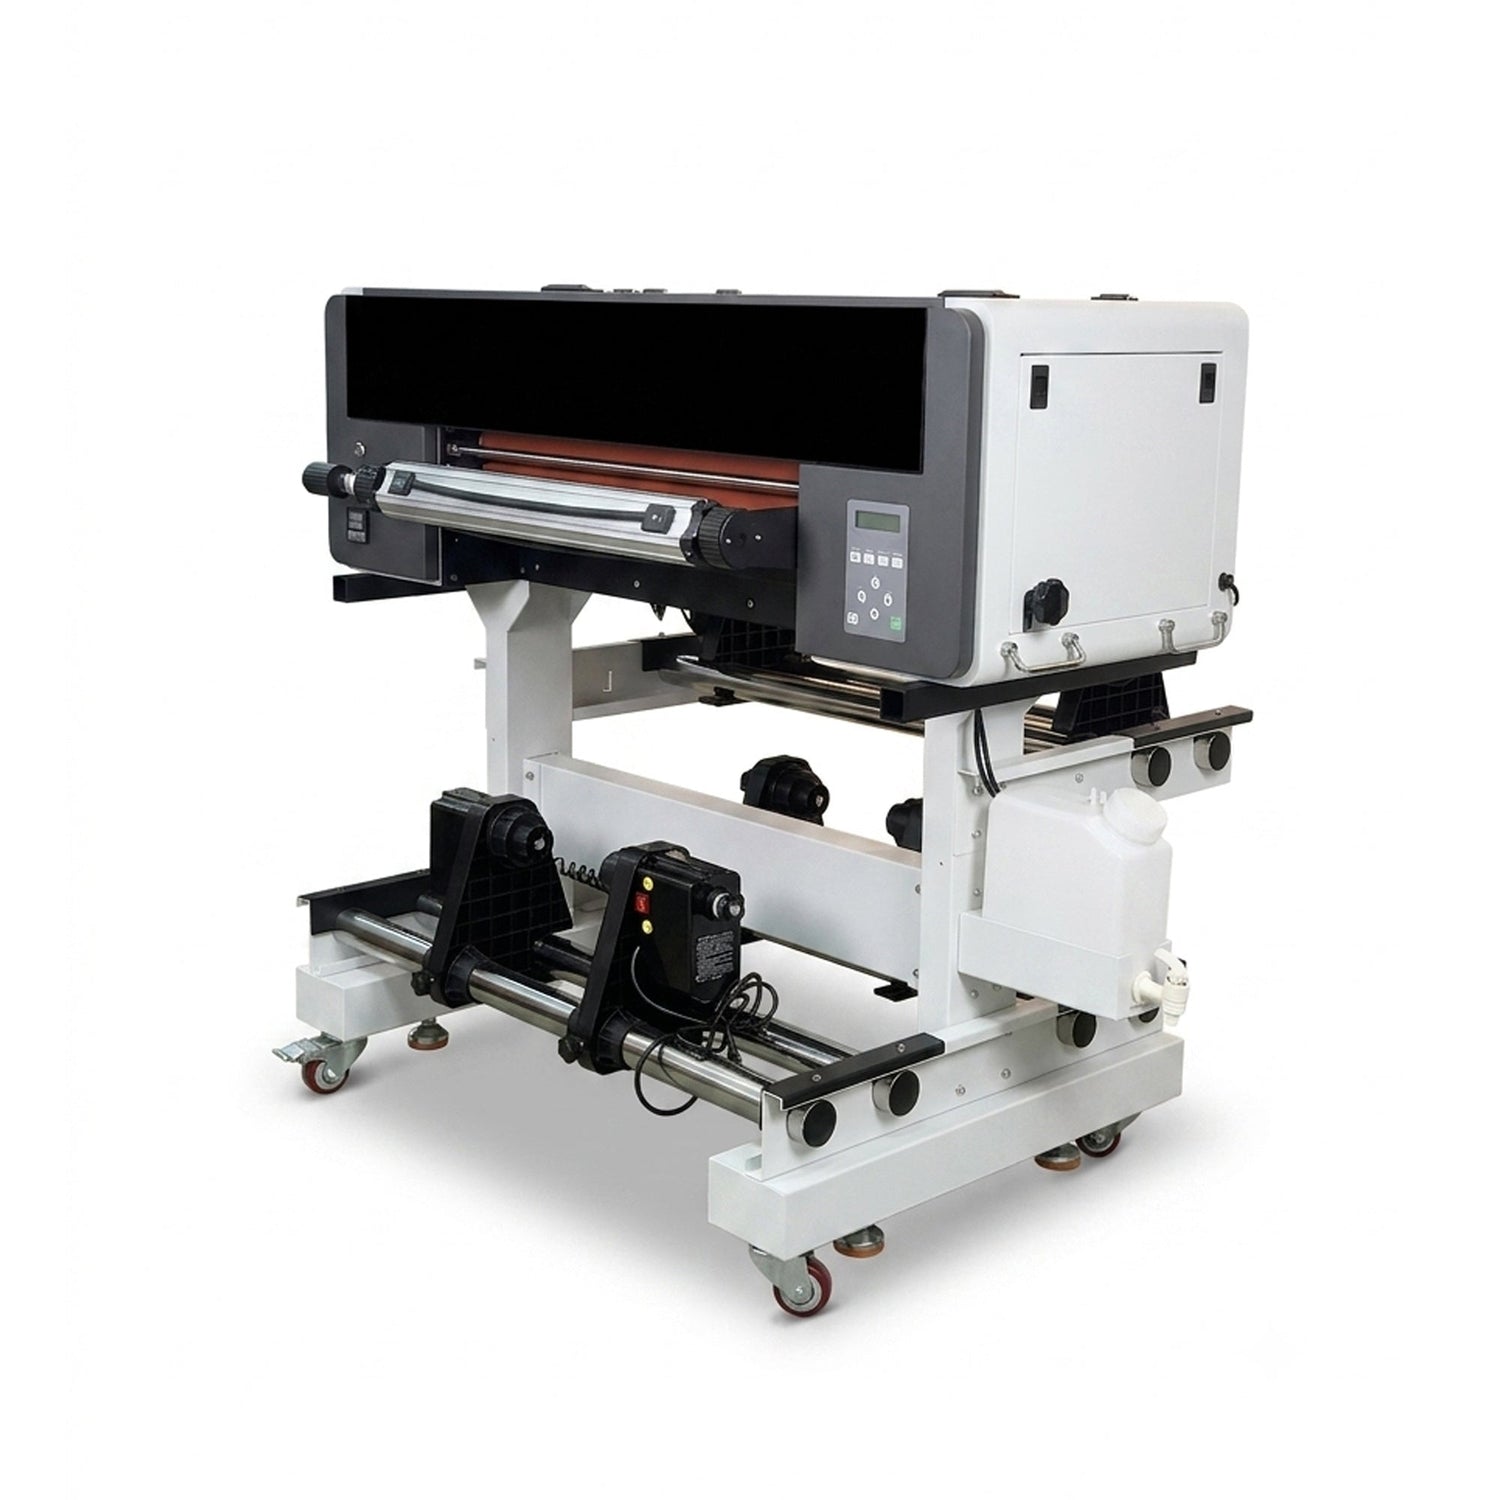
The printer is the foundation of the whole process, and not every UV DTF printer is set up for this job. You specifically need a machine that can run multiple passes of white ink to build physical height, alongside CMYK color and (ideally) a varnish channel for gloss and texture control. SHL's 24" UV DTF Printer T600HD is built around exactly this: a single Epson I3200HD printhead, a 600mm (24") print width, a CMYK + W + V ink configuration, and a print mode rated specifically for 3D TPU film (roughly 2–3 m²/hour depending on pass count), with automatic lamination built into the machine so the printed design is laminated with transfer film in the same workflow instead of a separate manual step.
If you already run a UV DTF printer for other products, check whether it supports multi-pass white ink and is rated for TPU film specifically before assuming it'll work—not every UV flatbed is built for the height and adhesion this technique needs.
2. UV Soft Ink Formulated for Imitation Embroidery
Standard UV ink isn't built to stack into a raised, flexible texture—it's designed to sit flat and cure hard. TPU embroidery needs a soft UV ink engineered to stay flexible after curing, so the finished patch bends with the fabric instead of cracking. SHL's UV Soft Ink CMYKW (1L) is sold specifically "for imitation embroidery printing," available as individual colors or a full CMYKW set, and carries ISO9001, ISO14001, CE, RoHS, and REACH certification—worth checking for if you're producing for retail brands with compliance requirements. The white channel is the one doing the heavy lifting here: it's what gets layered 4x, 6x, or more to physically build the raised base before color goes down on top.
3. TPU Transfer Film
This is the material that gives TPU embroidery its name and its texture. SHL's 3D TPU Heat Transfer Film is built as a 300-micron TPU layer over a 100-micron PVC release layer, sold in 24"×82ft and 12"×82ft rolls for production runs, or 13"×19" sheet packs (30 sheets) for smaller batches and testing. It comes in a range of finishes—white, silver, gold, holographic, glitter silver, glitter gold, matte silver, matte gold, and glow-in-the-dark—which is where a lot of the creative range in finished TPU embroidery patches actually comes from. The film's own thickness and elasticity (a 5–20% stretch-and-recovery range) is what gives the finished patch its flex and its wash durability, which is independently rated for industrial wash resistance in the range covered in article 2 of this series.
Some shops also add a TPU hot-melt adhesive powder as an extra bonding layer for tricky fabric blends, though it isn't strictly required for every application—it's worth having on hand if you're working across a wide range of fabric types.
The Complete Production Process, Step by Step
Step 1: Design and Prepare Your Artwork
Start with clean, high-resolution artwork—vector files where possible, or high-DPI raster files (300 DPI or higher at final print size) for photographic detail, since low-resolution source files tend to show soft or jagged edges once magnified by the raised ink layer. The key TPU-specific step happens here: you need to define a white ink layer in your RIP software that matches the shape of your design, and set how many passes it will print (commonly 4x for a subtle raised effect, up to 8–10x for a bolder, more pronounced 3D texture). More passes mean more height and a longer print time, so this is a real design trade-off, not just a technical setting. Depending on your printer and film, artwork may also need to be mirrored before printing, since the design transfers face-down onto the garment.
Step 2: Print with UV DTF (White Ink Layering + Color)
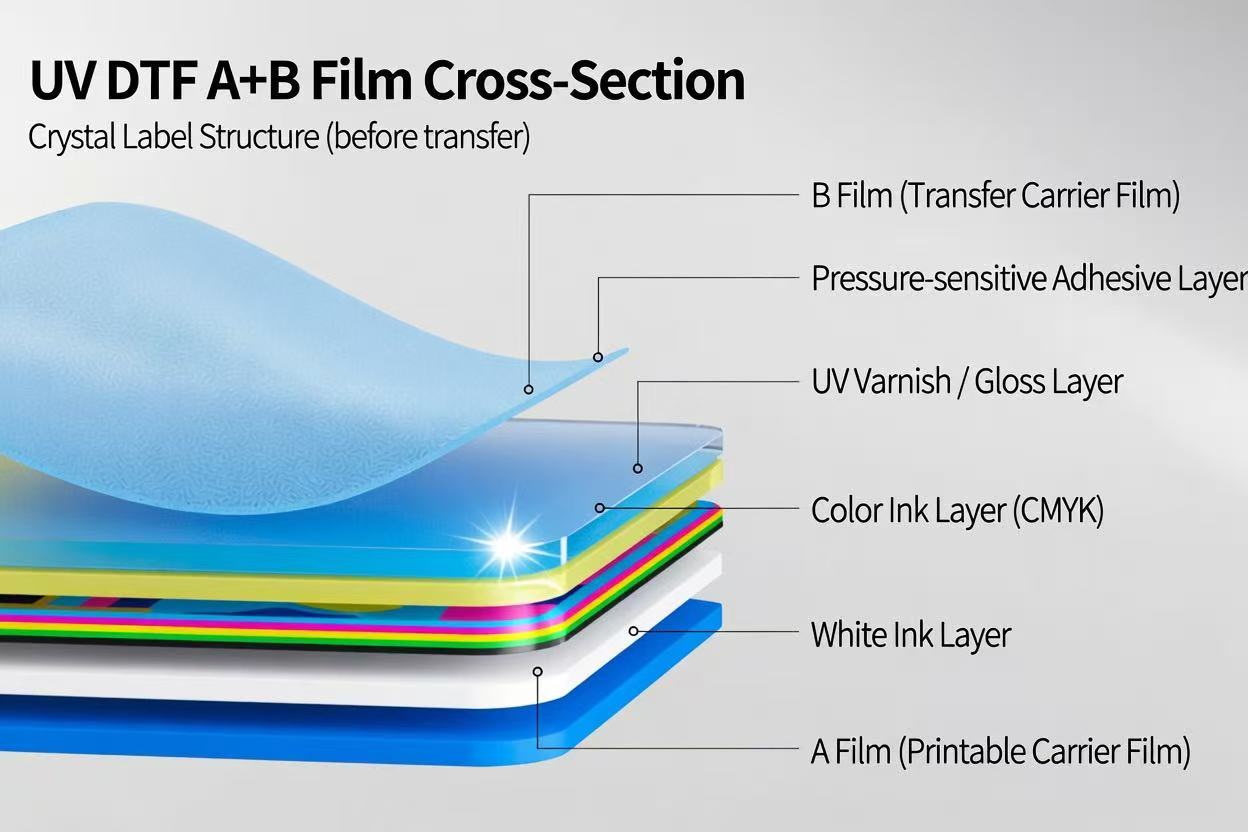
Send the file to the printer. The white ink lays down first, pass by pass, with each layer cured almost instantly by the UV lamps before the next one prints—this is what lets the layers stack cleanly instead of spreading into each other. Once the white base reaches the height you set, the CMYK color layers print on top, followed by a final UV cure pass.
Step 3: Laminate with TPU Film
The cured print needs to be laminated with the TPU transfer film so it can be handled and pressed as a unit. Some printers, including the T600HD referenced above, handle this automatically as part of the print run; other setups require a separate manual or roll laminator step. Either way, the goal is a clean, bubble-free bond between the printed ink and the film—air pockets here will show up as visible bubbles or weak spots in the finished patch.
Step 4: Cut to Shape
Depending on your product, you'll either contour-cut each design (for individual patches, logos, or labels) or leave the printed film on its roll or sheet for batch pressing (common for repeating small elements like jersey numbers). A vinyl cutter or plotter is the typical tool here if you're contour-cutting complex shapes.
Step 5: Heat Press onto the Garment
This step is where the design actually transfers onto the product. Based on the film specifications, the commonly recommended settings are 140–160°C for 10–15 seconds, applied with firm, even pressure across the entire design. Uneven pressure is one of the most common causes of a patch that presses fine in the center but lifts at the edges, so on thicker or uneven garments, a heat press pillow or foam pad to equalize pressure across the surface is worth using.
Step 6: Cool, Peel, and Inspect
Most TPU transfer films are designed as a cold-peel product—let the patch cool to room temperature before removing the carrier film, rather than peeling hot. Peeling too early is a common cause of a patch that looks fine at first and then fails after the first wash. Once peeled, do a quick visual and tactile quality check: even white ink height across the design, no bubbling, and firm adhesion at every edge, especially corners and fine detail areas. If you're setting up a new process or a new fabric type, it's worth running one finished sample through an actual wash cycle before signing off on the settings—press quality can look perfect fresh off the heat press and still reveal a weak edge or two after the first wash.
Common Beginner Mistakes (and How to Avoid Them)
A few issues account for most of the early production problems shops run into:
- Uneven white ink layering. If the raised texture looks patchy or the height varies across the design, check your printer's nozzle check pattern first—a partially clogged nozzle will under-lay white ink in specific spots. Also confirm your pass count setting matches across your whole print run; a dropped or inconsistent pass count is a common software-side cause.
- Bubbles under the laminate. Air pockets between the printed ink and the TPU film usually trace back to dust or debris on the print surface, inconsistent lamination pressure, or laminating before the ink layer has fully cured. Keep the print area clean and make sure your lamination step (automatic or manual) applies even pressure across the full design.
- Edges lifting after heat pressing. This is almost always a temperature, time, or pressure issue—press too cool or too briefly and the adhesive doesn't fully activate; press with uneven pressure and thicker areas of the design won't get full contact. Start at the film manufacturer's recommended range (140–160°C, 10–15 seconds) and adjust in small increments rather than guessing.
- Mismatched ink and film. Because TPU embroidery depends on the ink and film bonding correctly under UV cure and heat, mixing an ink from one supplier with film from another—each formulated slightly differently—is a common source of adhesion problems that are hard to diagnose after the fact. If something isn't working and your settings otherwise look correct, ink-film compatibility is worth checking before assuming it's a machine or operator error.
Most of these are dialed in within the first few test presses once you're using ink and film that are actually designed to work together—which is a large part of why sourcing matched components matters more here than it does for simpler print methods.
The SHL Supply TPU Embroidery Setup
To make this easier to act on, here's the exact combination referenced throughout this guide, all sourced from one supplier so the printer, ink, and film are working with each other rather than against each other:
Printer: 24" UV DTF Printer T600HD
Single Epson I3200HD printhead, 600mm (24") print width, CMYK + W + V ink channels, automatic lamination built in, rated for both standard UV DTF ink and TPU ink, with a print speed specifically listed for 3D TPU film. View the T600HD →
Ink: UV Soft Ink CMYKW (1L)
Formulated specifically for imitation embroidery printing, available by individual color or as a full CMYKW set, ISO9001/ISO14001/CE/RoHS/REACH certified. View the UV Soft Ink →
Film: 3D TPU Heat Transfer Film
300-micron TPU over a 100-micron PVC release layer, available in roll (24"×82ft, 12"×82ft) or 13"×19" sheet packs, in white, silver, gold, holographic, glitter, matte, and glow-in-the-dark finishes. View the 3D TPU Film →
The value of sourcing all three from the same place isn't just convenience—it's that the ink-film-printer compatibility has already been tested together, which removes the trial-and-error most shops go through when they mix and match components from different suppliers and can't figure out why their texture or adhesion isn't coming out right.
Getting Started Without Overcommitting
If you're new to TPU embroidery, there's no need to buy a full production roll of film on day one. A practical path:
- Start with a sample sheet pack (like the 13"×19" 30-sheet option) rather than a full roll, and run a handful of test designs to confirm your printer settings, pass counts, and press parameters before scaling up.
- Test on the actual garments you plan to sell on, not just scrap fabric—adhesion and feel can vary meaningfully between a cotton hoodie, a technical jersey, and a nylon cap.
- Once your test batch checks out—even height, clean edges, no lifting after a wash test—move to roll film and larger production runs with confidence in your settings.
This staged approach costs a little more per unit early on, but it avoids the far more expensive mistake of committing to a full roll of film before your process is dialed in.
What's Next
Once you've got a working TPU embroidery setup, the same printer, ink, and UV DTF skill set opens up more than just patches and labels. In the next article, we'll look at what else you can produce with this exact equipment—so the investment you're making here pays off across more than one product line.
Ready to get started? [Shop the TPU Embroidery Starter Bundle →]
FAQ
What printer do I need for TPU embroidery? You need a UV DTF printer capable of layering multiple passes of white ink to build height, ideally with a dedicated varnish channel and a print mode rated for TPU film specifically—not every UV DTF printer is built for this. SHL's 24" UV DTF Printer T600HD, for example, is configured with CMYK + W + V channels and a print speed rated for 3D TPU film.
Can I use regular DTF ink for TPU embroidery? Not reliably. Standard UV DTF ink is formulated to cure flat and rigid, which can crack once the film flexes with the fabric. TPU embroidery needs a soft UV ink designed to stay flexible after curing, so it bends with the garment instead of cracking at the raised edges.
What temperature do you press TPU embroidery film at? Commonly 140–160°C for about 10–15 seconds, applied with firm, even pressure across the full design. Exact settings can vary slightly by film and press, so it's worth doing a few test presses at the low end of that range and adjusting up if adhesion isn't fully set.
Is TPU embroidery hard to learn for beginners? Not particularly, if you're starting from ink and film that are designed to work together. The core skills—setting a white ink pass count, laminating cleanly, and dialing in heat press time and temperature—are usually solid within a handful of test prints. Starting with a small sample pack rather than a full production roll makes the learning curve even lower.

Leave a comment
This site is protected by hCaptcha and the hCaptcha Privacy Policy and Terms of Service apply.