
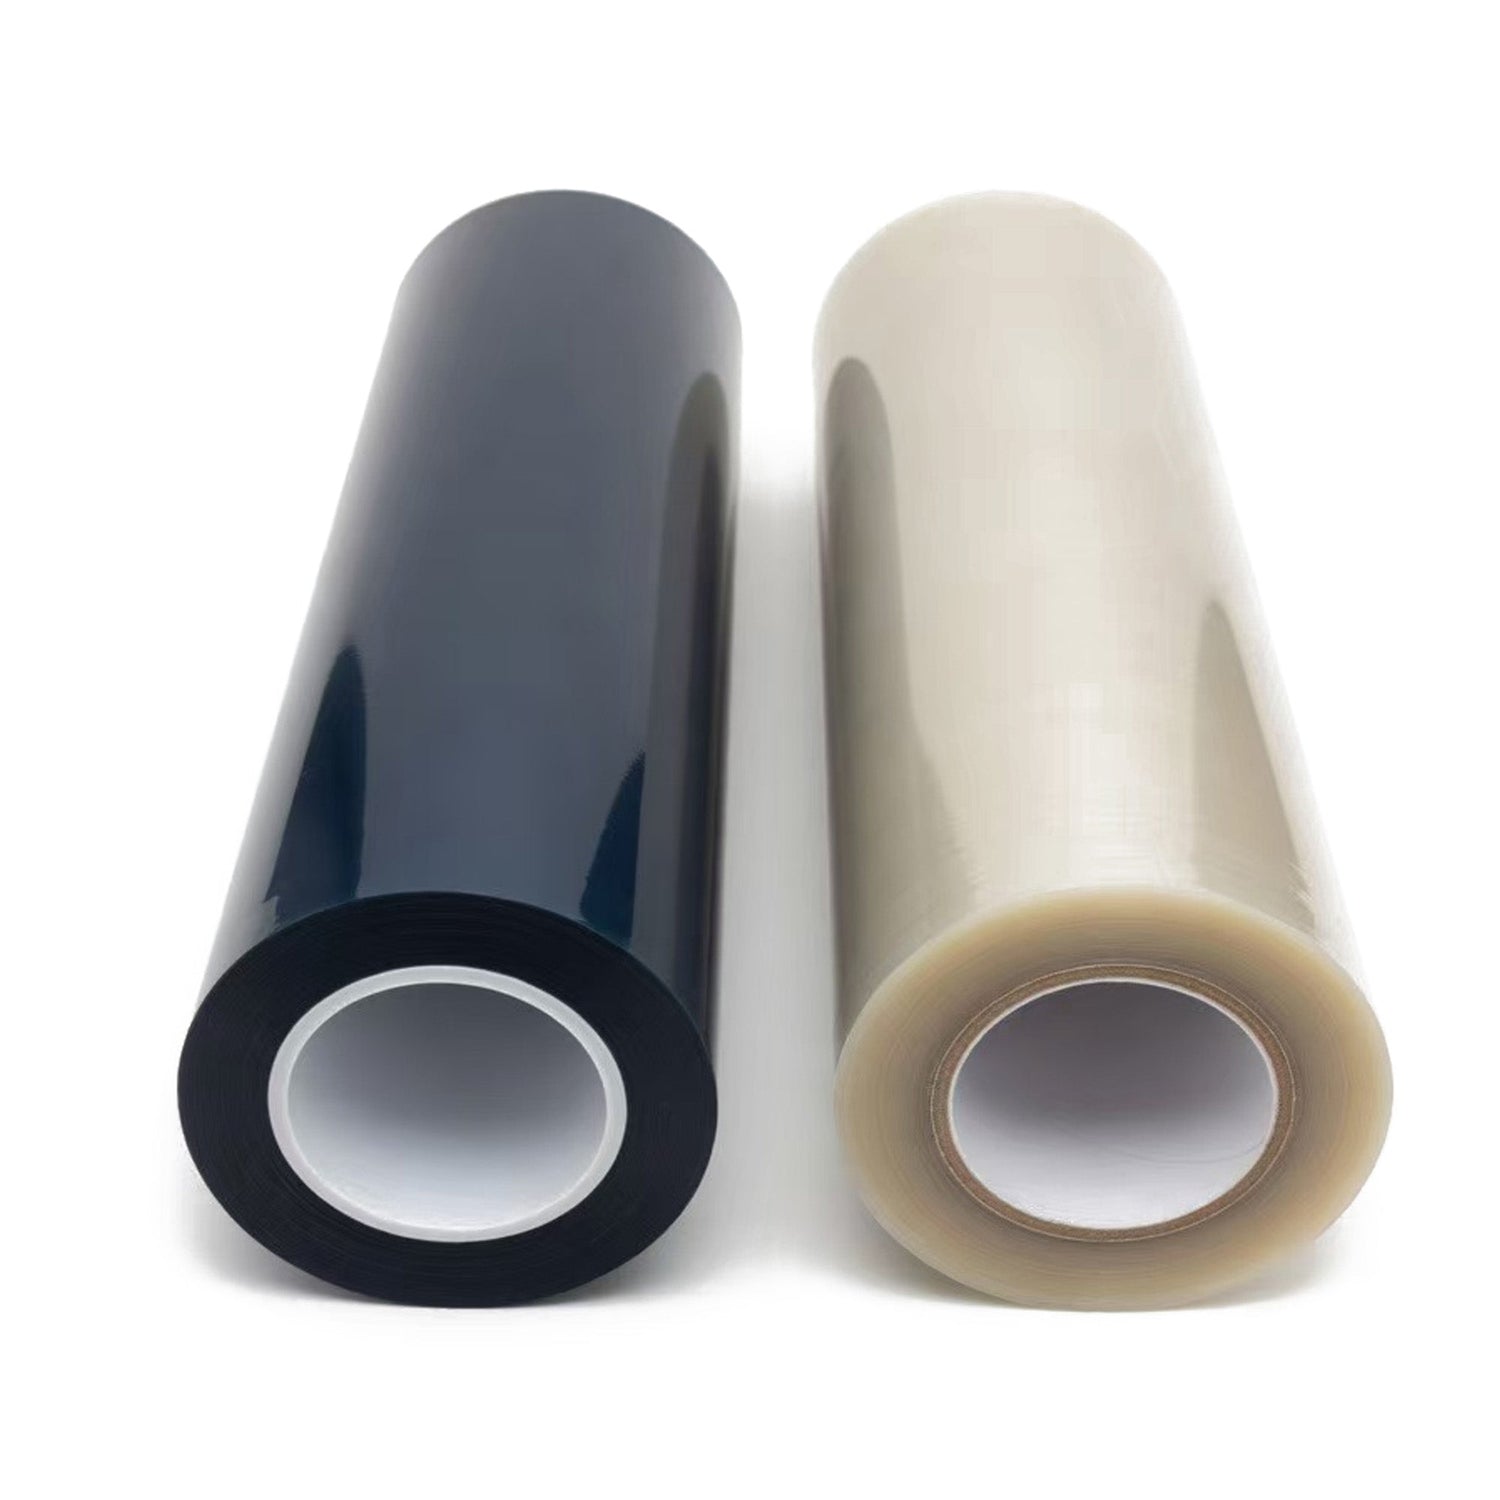
Quick Answer: UV DTF transfers (crystal labels) fail to stick — or lift at the edges — for four main reasons: (1) the substrate surface was not properly cleaned — even invisible fingerprint oils block the B film adhesive; (2) the substrate has a low-energy or hydrophobic coating like Teflon or treated glass; (3) the UV ink was over-cured, making it brittle and unable to flex with the adhesive layer; (4) low-quality B film adhesive insufficient for the substrate type. Clean every surface with 90%+ isopropyl alcohol before application — this single step eliminates the majority of adhesion failures.
1. What a UV DTF Adhesion Failure Actually Looks Like
UV DTF crystal labels are marketed as sticking to "virtually any surface" — and when everything is done correctly with quality materials, they deliver on that promise. But in real production, adhesion failures happen in recognizable patterns. Knowing which failure type you have tells you exactly which cause to investigate first.
| Failure Pattern | When It Appears | Primary Suspect |
|---|---|---|
| Edge lifting immediately after Film B removal | Within seconds of application | Surface contamination; over-cured ink; problem substrate coating |
| Corners lifting within 24–48 hours | After initial application seems fine | Surface contamination that wasn't fully removed; low-energy substrate |
| Entire transfer lifts cleanly off — leaves no residue | During or right after Film B peeling | Over-cured, brittle ink that couldn't bond to B film adhesive; or incompatible hydrophobic surface |
| Air bubbles under the transfer surface | During application | Trapped air during application; surface condensation; surface too curved |
| Transfer sticks in center but lifts at edges | After application | Application pressure not uniform — edges not fully squeegeed; surface curvature |
| Transfer appears bonded but scratches off easily with fingernail | During durability test | Insufficient B film adhesive strength for this substrate type; surface not cleaned |
2. The 4 Root Causes of Poor UV DTF Transfer Adhesion
🧪 Cause 1: Surface Contamination
Invisible oils, fingerprints, dust, manufacturing release agents, and silicone residue on the substrate surface prevent the B film adhesive from making molecular contact with the substrate.
Responsible for: ~60% of all adhesion failures in typical US print shops
Fix: Clean with 90%+ IPA and lint-free cloth — every time, on every substrate
🛡️ Cause 2: Problem Substrate Coating
Certain surface treatments — Teflon, hydrophobic glass coatings, powder-coat paint, anodized aluminum, silicone release coatings — are intentionally designed to resist adhesion. The B film adhesive simply cannot grip these surfaces regardless of cleaning.
Responsible for: ~20% of failures — often on specialty items
Fix: Surface testing before production; different substrate or mechanical adhesion
⚡ Cause 3: UV Over-Curing
Running UV LED power too high makes the ink layer excessively crosslinked and brittle. It loses the micro-flexibility needed to bond properly with the B film adhesive surface — causing the transfer to detach cleanly.
Responsible for: ~15% of failures — common with new machines or after settings change
Fix: Reduce UV LED power to 70–85% and test flexibility of cured ink
🎞️ Cause 4: Low-Quality B Film Adhesive
Budget UV DTF AB film uses weaker adhesive formulations in Film B that cannot achieve lasting bond strength on smooth, low-porosity surfaces like glass, ceramic, or stainless steel.
Responsible for: ~5% of failures — but often blamed for other causes
Fix: Upgrade to SHL's premium AB film with high-strength adhesive B film
3. Cause 1 Deep Dive: Surface Contamination
This is the cause of the majority of UV DTF adhesion failures in US print shops — and the most preventable. The B film adhesive in UV DTF transfers works by making direct molecular contact with the substrate surface. Any contamination layer — even a microscopically thin one — prevents this contact and defeats the adhesive.
What Contaminates Substrates Without Being Visible
| Contamination Type | Source | Effect on Adhesion | Removed by IPA? |
|---|---|---|---|
| Skin oil / fingerprints | Handling the substrate with bare hands | Creates a grease barrier the adhesive cannot penetrate | ✅ Yes — fully |
| Manufacturing release agents | Factory applied to molds for glass and ceramic production | Intentionally prevents adhesion — from the factory | ✅ Yes — usually |
| Shipping and storage dust | Warehouse and transit exposure | Prevents full adhesive contact in dusted areas | ✅ Yes |
| Water spots / mineral deposits | Tap water residue on glass or stainless | Creates raised mineral spots that lift adhesive off surface | ✅ Yes — with light scrub |
| Silicone residue | Silicone-based polishes, mold releases, some lubricants | Creates a near-invisible non-stick barrier | ⚠️ Partially — may need repeat wipes |
| Wax or polish | Car wax on metal parts; furniture polish; wax-coated packaging | Extremely effective adhesion barrier | ⚠️ Requires multiple IPA wipes or acetone |
The Right Way to Clean — and the Wrong Way
| Cleaning Method | Effective? | Notes |
|---|---|---|
| 90%+ Isopropyl Alcohol (IPA) + lint-free cloth | ✅ Best choice | Removes oils, fingerprints, dust, most release agents. Safe for glass, metal, ceramic, plastic |
| 70% IPA (rubbing alcohol) | ⚠️ Marginal | 30% water content — leaves moisture residue and takes longer to dry. Use only if 90%+ unavailable |
| Water + dish soap + rinse | ⚠️ Not recommended | Removes some contamination but leaves water mineral deposits and soap residue that inhibit adhesion |
| Paper towels + IPA | ⚠️ Poor choice | Paper towels leave micro-fiber lint on the surface that prevents full adhesive contact |
| Dry cloth wipe (no solvent) | ❌ Ineffective | Just redistributes skin oils and dust — does not remove them |
| Acetone | ⚠️ Use with caution | Removes wax and silicone that IPA cannot — but can fog acrylic, damage some plastics, and strip painted surfaces. Test first. |
4. Cause 2 Deep Dive: Problem Substrate Coatings
Some surfaces are specifically engineered to resist adhesion — and UV DTF B film adhesive, no matter how strong, cannot overcome this by design. Recognizing these surfaces before taking a customer order saves you from guaranteed refunds.
The Science: Surface Energy and Why It Matters
Every surface has a property called surface energy, measured in dynes/cm. For an adhesive to bond, the adhesive's surface energy must be lower than the substrate's surface energy. Substrates with very low surface energy are said to be "non-wettable" — the adhesive forms a bead on them rather than spreading and bonding.
| Surface Type | Approximate Surface Energy | UV DTF Adhesion | Notes |
|---|---|---|---|
| Glass (clean) | ~70 dynes/cm (High) | ✅ Excellent | One of the best substrates — adheres strongly with clean surface |
| Stainless steel (clean) | ~40 dynes/cm | ✅ Good | Clean thoroughly — surface oil from handling is common on steel |
| Ceramic (glazed) | ~45–55 dynes/cm | ✅ Good | Glazed ceramic bonds well — unglazed/porous ceramic bonds poorly |
| Acrylic / PMMA | ~40 dynes/cm | ✅ Good | Popular for signage and awards — strong adhesion |
| Polycarbonate plastic | ~42 dynes/cm | ✅ Good | Phone cases — cleans well, good adhesion |
| Wood (sealed/lacquered) | ~35–45 dynes/cm | ⚠️ Variable | Lacquered wood bonds; raw/oily wood or wax-finished wood does not |
| Leather (smooth) | ~35–40 dynes/cm | ⚠️ Variable | Clean genuine leather bonds; treated or waterproofed leather often does not |
| Hydrophobic-treated glass | ~18–22 dynes/cm (Very Low) | ❌ Will not bond | RainX, self-cleaning coatings, shower hydrophobic treatments — adhesive cannot grip |
| Teflon / PTFE | ~18 dynes/cm (Extremely Low) | ❌ Will not bond | Non-stick cookware and PTFE-coated industrial surfaces — no adhesive bonds |
| Silicone | ~22 dynes/cm (Very Low) | ❌ Will not bond | Silicone phone cases, silicone-coated surfaces — adhesive fails completely |
| PE / PP plastics (untreated) | ~29–35 dynes/cm | ⚠️ Poor–marginal | Packaging plastics — low adhesion; flame or plasma treatment improves, but complex |
5. Cause 3 Deep Dive: UV Over-Curing and Brittle Ink
UV DTF printing requires the ink to be cured just enough to solidify and hold its shape — but not so much that it becomes rigid and glass-like. This balance is critical for adhesion because the B film adhesive in Film B works by bonding to the slightly flexible surface of the cured ink layer. If the ink is over-cured, it becomes too stiff for this adhesive mechanism to work.
How to Diagnose Over-Curing
After printing and before lamination, perform this simple flexibility test:
- Cut a small 2×2cm test piece from the printed Film A
- Hold it between two fingers and gently flex it back and forth
- Listen and feel for the response:
- Flexes smoothly with slight resistance — no crackling: Correctly cured ✅
- Feels rigid, resists bending, crackles when flexed: Over-cured — reduce UV power 🔴
- Feels very soft and gummy, ink wants to smear: Under-cured — increase UV power or slow print speed 🟡
UV LED Power Settings to Prevent Over-Curing
| UV LED Power | Ink Behavior | Adhesion Result | Recommendation |
|---|---|---|---|
| 60–70% | Soft, slightly tacky — may smear | Poor — under-cured ink doesn't bond firmly to film surface | Too low — risk of print quality issues |
| 70–80% | Firm but slightly flexible — ideal texture | ✅ Best adhesion to B film and substrate | Start here for most UV DTF AB film printing |
| 80–90% | Firm, minimal flex | Good — acceptable for most applications | Acceptable; monitor ink flex periodically |
| 90–100% | Rigid, glass-like, crackles when flexed | ❌ Over-cured — adhesion failure, brittle edges | Reduce power; this will cause lifting and edge delamination |
6. Cause 4 Deep Dive: B Film Adhesive Quality
The B film in a UV DTF AB set is the adhesive carrier that actually bonds to the substrate. Budget B film uses weaker, thinner adhesive coatings that perform adequately on easy substrates like wood and matte plastic, but fail on smooth, low-energy surfaces like glass, glazed ceramic, and polished stainless steel.
How B Film Adhesive Quality Affects Performance
| Property | Budget B Film | SHL Premium B Film Recommended |
|---|---|---|
| Adhesive Strength | Moderate — sufficient for porous/rough surfaces only | High — bonds to glass, ceramic, metal, plastic, leather |
| Adhesive Uniformity | Variable coating — gaps create weak spots | Uniform coating across full roll width |
| Residue on Removal | Often leaves adhesive ghosting on the substrate | No residue — clean removal from substrate if needed |
| Bubble Formation | Higher tendency — uneven adhesive fails to grip | Lower tendency — uniform adhesive prevents air pockets |
| Shelf Life (opened) | Adhesive degrades faster — prone to loss of tack | Stable adhesive — longer working life once opened |
| US Stock Availability | Often 2–4 week import lead time | In-stock at SHL LA — same/next-day shipping |
7. How to Apply UV DTF Transfers for Maximum Adhesion — Step by Step
Print at the Correct UV LED Power
Before printing a production run, set your UV LED power to 70–80% of maximum in your RIP software or printer control panel. Print a small test piece and perform the flexibility test:
- Gently flex the printed film — it should bend slightly without crackling
- If it feels brittle or crackles: reduce UV power 5–10% and retest
- If it feels soft or tacky after 60 seconds: increase UV power 5% or slow print speed
Only proceed to production when the test print passes the flexibility test.
Laminate Film B Over Film A Without Bubbles
- Feed printed Film A (design side up) through your cold laminator with Film B aligned on top, adhesive side down
- Set laminator roller pressure to medium — too light allows air pockets; too heavy can distort the design
- Feed slowly and evenly — no jerking or stopping mid-pass
- After lamination, inspect for bubbles: hold the laminated film at an angle against a light. Bubbles appear as lighter areas
- If bubbles are present, run through the laminator again at slightly higher pressure
- Allow 5–10 minutes rest time before cutting — lets adhesive fully contact the ink surface
Cut the Transfer
- Use a vinyl cutter with contour cutting for precise shapes, or scissors/craft knife for simple shapes
- Cut cleanly — jagged or rough edges lift more easily than clean cuts
- Leave at least 1–2mm of clear B film beyond the design edges — this is the adhesive border that keeps edges from lifting
Clean the Substrate with 90%+ IPA
- Apply 90%+ isopropyl alcohol to a lint-free cloth — not to the substrate directly (avoids puddling)
- Wipe the application area with firm, even pressure in one direction
- Do not touch the cleaned area with bare fingers after wiping — the oil from one fingertip immediately recontaminates the surface
- Allow the surface to dry fully — minimum 30–60 seconds. IPA evaporates quickly but any residual moisture must be gone before applying the transfer
- For stainless steel tumblers or bottles: optionally warm the surface to 30–40°C with a heat gun on low setting — this improves adhesive flow and initial bond strength on metal
- For glass: after IPA cleaning, hold under a strong light at an angle — any remaining water spots or smears will be visible. Re-wipe if necessary
Peel Film A and Position the Transfer
- Hold the AB film at two opposite corners
- Begin peeling Film A (the printed film) away from Film B at a 180° angle — fold Film A back on itself rather than peeling at 90°
- The design should transfer cleanly to Film B (adhesive side). If ink stays on Film A instead of Film B, there may be an under-cure or film compatibility issue
- Position Film B with the design (now visible through the clear B film) facing down onto the cleaned substrate. Do not press yet — just align
Apply with Squeegee from Center Outward
- Starting at the center of the design, press the B film firmly against the substrate with a felt squeegee, rubber brayer, or firm finger pressure
- Push outward toward the edges in four directions — top, bottom, left, right. This forces any air pockets out rather than trapping them
- Apply firm, even pressure across the entire design — paying extra attention to edges and corners, which are most vulnerable to lifting
- For curved surfaces (tumblers, bottles): work in small overlapping sections following the curve, keeping the film taut to prevent wrinkles
Peel Film B and Inspect
- Peel Film B slowly at a low angle (20–30°) — not straight up. Low-angle peeling puts less stress on the design edges
- The design should remain cleanly on the substrate with sharp edges and no lifting
-
Inspect immediately:
- All edges flat? ✅ Proceed
- Any edge lifting: press firmly with squeegee or fingernail and hold 10 seconds. If it re-lifts, there is a substrate or cure issue
- Any bubbles remaining: press firmly from center outward again
- Film B should peel away cleanly with no adhesive residue left on the surrounding substrate — only on the design area
8. Substrate Compatibility Table: What Sticks, What Doesn't
| Substrate | UV DTF Adhesion | Prep Required | Watch Out For |
|---|---|---|---|
| Borosilicate glass (tumblers, cups) | ✅ Excellent | 90%+ IPA wipe; dry completely | Condensation on cold glass; rim oils from handling |
| Soda-lime glass (bottles, jars) | ✅ Excellent | 90%+ IPA wipe | Manufacturing release agent on new bottles — wipe thoroughly |
| Glazed ceramic (mugs, tiles) | ✅ Excellent | 90%+ IPA wipe | Unglazed or matte-fired ceramic — adhesion is poor on porous surface |
| Stainless steel (tumblers, flasks) | ✅ Good | 90%+ IPA wipe; warm to 30–40°C optional | Brushed finish textures can reduce contact area — press firmly |
| Powder-coated steel | ⚠️ Variable | IPA wipe; test first | Thick powder coat texture reduces adhesive contact — thin powder coat bonds better |
| Acrylic / clear PMMA | ✅ Excellent | IPA wipe; avoid acetone (fogs acrylic) | Protective film on new acrylic must be removed before wiping |
| Hard polycarbonate (phone cases) | ✅ Good | IPA wipe | Flexible TPU phone cases — adhesion poor on flexible surfaces |
| ABS plastic | ✅ Good | IPA wipe | Check for mold release agent on new plastic parts |
| Anodized aluminum | ⚠️ Moderate | Thorough IPA wipe | Anodize coating varies — test before production run |
| Polished aluminum (bare) | ✅ Good | IPA + IPA repeat wipe | Oxidation layer — wipe vigorously |
| Hydrophobic glass (RainX treated) | ❌ Will not bond | No prep resolves this | Inform customer before ordering |
| Teflon / PTFE coated | ❌ Will not bond | No prep resolves this | Non-stick cookware — incompatible substrate |
| Silicone (flexible) | ❌ Will not bond | No prep resolves this | Silicone phone cases, silicone kitchen items |
| Leather (smooth, natural) | ⚠️ Variable | IPA wipe; test first | Waterproofed leather, waxed leather — adhesion poor |
| Sealed / lacquered wood | ✅ Good | IPA wipe | Wax-finished or oily wood (teak, rosewood) — poor adhesion |
9. UV Cure Power Settings Reference
| Printer Type | Recommended UV Power for AB Film | Print Speed | Flexibility Check Result |
|---|---|---|---|
| SHL 24" UV DTF Printer (Epson i3200-U1) | 70–80% LED power | 6-pass for quality | Slight flex — correct |
| A3 UV DTF Printer (Epson DX7) | 65–75% LED power | Standard/medium | Slight flex — correct |
| Any UV DTF roll-to-roll printer | Start at 75%, adjust from flex test | Medium — not maximum | Target: slight flexibility, no crackling |
Signs Your UV Power Setting Is Wrong
| Observation | UV Power Issue | Adjustment |
|---|---|---|
| Transfer is brittle, cracks when flexed, edges snap off cleanly | Over-cured — too much UV | Reduce UV power 10–15%; retest |
| Transfer peels completely off substrate with no residue | Over-cured — ink too rigid to bond with B film adhesive | Reduce UV power 10%; also check IPA surface prep |
| Transfer feels slightly soft after peeling Film A; ink smears | Under-cured — insufficient UV | Increase UV power 5–10% or slow print speed |
| Ink "strings" when Film A is peeled away from B film | Wrong ink type — Soft UV ink used instead of Hard UV ink | Switch to Hard UV or Neutral UV ink for AB film printing |
10. Why UV DTF Transfers Bubble — and How to Prevent It
Bubbles under a UV DTF transfer after application are a distinct problem from lifting — though both can appear on the same failed piece. Here is the cause and fix for each bubble type:
| Bubble Type | Cause | Prevention | Fix After Application |
|---|---|---|---|
| Small bubbles across the design surface | Air trapped during Film B lamination — gaps in B film adhesive contact with Film A | Increase laminator roller pressure slightly; feed slowly; use felt squeegee on application | Press firmly with squeegee — small lamination bubbles often resolve with pressure |
| Large bubbles during application | Air pushed in from edges during application — film applied from one side rather than center-out | Always apply from center outward; never press an edge down first then work across | Lift the film at the nearest edge, press air out, re-apply |
| Surface moisture bubbles (appear on cold glass) | Condensation on cold substrate — invisible water layer traps air and prevents adhesion | Warm cold substrates to room temperature (20°C+) before wiping and applying; wipe twice | Cannot be fixed after application — must re-prepare surface |
| Bridging bubbles on curved surfaces | Film cannot conform to tight curve — spans across rather than following the surface | Work in small sections; warm film to 25–30°C; use slow, progressive pressure | Lift and re-apply in sections if detected early |
11. Why AB Film Quality Determines Adhesion Performance
The B film is the hidden variable in most UV DTF adhesion failures. When shops switch from budget AB film to SHL's premium AB film and the adhesion problems disappear, it confirms what the substrate compatibility table and surface energy data predict — the adhesive strength of the B film matters enormously for smooth, low-porosity substrates.
SHL UV DTF AB Film — Full Specifications
| Property | Specification |
|---|---|
| Film Name | UV DTF AB Film Roll (Film A + Film B set) |
| Material | PET (Film A print carrier + Film B adhesive carrier) |
| Width Available | 12 inch (13in package) · 24 inch (25in package) |
| Roll Length | 328 ft (100 m) per roll |
| Compatible Surfaces | Glass, ceramics, metal, plastic, leather, wood, paper, cardboard, acrylic |
| Finish | High gloss / varnish |
| Heat Required | No heat press needed — cold transfer lamination |
| Ink Compatibility | Hard UV ink or Neutral UV ink (not Soft UV ink) |
| Durability | Waterproof, scratch-resistant, UV-resistant — 2–5 years indoor/outdoor |
| Adhesive Residue | None — clean removal, no ghosting on substrate |
| US Stock | In-stock at SHL LA — same/next-day shipping from Santa Fe Springs, CA |
12. Why SHL Supply: LA Stock, Same-Day Shipping & US-Based Support
UV DTF crystal label production requires consumables you can count on — and local support you can reach when something goes wrong. SHL Supply is built to deliver both.
🚚 Same-Day and Next-Day Shipping from Los Angeles
SHL's UV DTF AB Film is stocked in our Santa Fe Springs, CA warehouse and ships the same or next business day. No 3-week freight wait for a consumable that affects every order you produce. Local US stock means:
- Same-day dispatch on orders before 2 PM PST
- No customs fees, no import delays, no moisture damage from ocean freight containers
- Fresh film stock — not aged rolls that have been sitting in a humid warehouse for months
🏫 In-Person UV DTF Application Training at Santa Fe Springs, CA
UV DTF crystal label application is a skill that comes together quickly with the right guidance — but takes much longer to figure out through trial and error alone. SHL offers hands-on training at 12155 Mora Dr, Santa Fe Springs, CA 90670 for UV printer and AB film customers, covering:
- Correct UV LED power calibration using the flexibility test on your specific printer
- IPA surface preparation technique for different substrate types
- Cold laminator setup and pressure calibration for bubble-free Film B application
- Squeegee technique for flat, curved, and irregular surfaces
- How to identify and troubleshoot adhesion failures before a full production run
- Substrate compatibility testing protocol for new product types
You leave with a substrate prep checklist and a UV power calibration log for your specific machine.
🛠️ US-Based Technical Support — Same Business Hours
When a customer reports that their custom tumbler decals are lifting and you need an answer now — not in 12 hours — SHL's US-based support team is a phone call away:
- 📞 562-203-5165 · Monday–Friday, 9 AM–5 PM PST
- ✉️ info@shl-supply.com · Same-business-day response
- 📍 In-person at Santa Fe Springs — by appointment for complex substrate compatibility questions
💲 Wholesale Pricing — One Price for Every Customer
Whether you order a single 2-roll AB film set or a month's supply, SHL offers the same flat wholesale price. No volume tiers, no negotiation — the same price a large commercial shop pays is available to a solo custom product creator.
13. Frequently Asked Questions
Why is my UV DTF transfer not sticking to glass or metal?
Four main causes: (1) surface contamination — invisible oils, fingerprints, or release agents block the B film adhesive; (2) hydrophobic or low-energy surface coating on the substrate; (3) UV ink over-cured and brittle — cannot flex with the B film adhesive; (4) budget B film with insufficient adhesive strength for smooth surfaces. Start by wiping the surface with 90%+ IPA and a lint-free cloth and retesting.
How do I properly clean a substrate before applying a UV DTF transfer?
Apply 90%+ IPA to a lint-free cloth (not directly to the substrate). Wipe in one direction with firm pressure. Allow 30–60 seconds to dry fully. Do not touch the cleaned area with bare fingers. For stainless steel, optionally warm to 30–40°C after wiping. For glass, inspect under angled light after wiping to ensure no streaks or water spots remain.
What surfaces can UV DTF crystal label transfers NOT bond to?
Surfaces UV DTF will not reliably bond to: Teflon/PTFE coated (non-stick cookware); hydrophobic-treated glass (RainX, self-cleaning coatings); active silicone or wax coatings; flexible silicone surfaces; highly flexible substrates (TPU phone cases, fabric); porous/unglazed ceramic; PE and PP plastics (untreated). When in doubt, do the water-bead test: if water beads up tightly, the surface likely won't hold UV DTF adhesive.
Can UV over-curing cause UV DTF transfers to peel?
Yes. Over-cured ink becomes brittle and glass-like — it cannot flex with the B film adhesive surface, causing the transfer to separate cleanly rather than bonding. Target UV LED power at 70–80% and test with the flexibility test: the cured ink should flex slightly without crackling.
Why is my UV DTF transfer bubbling after application?
Bubbles are caused by: (1) air trapped during lamination — increase laminator pressure; (2) air pushed in from edges during application — always work from center outward; (3) surface condensation on cold glass or ceramic — warm to room temperature first; (4) surface too curved for the film to conform — work in small sections and warm the film slightly.
How long does a UV DTF crystal label last on glass or metal?
On properly cleaned, compatible surfaces with quality AB film, 2–5 years for indoor use with normal handling. For regularly washed items (tumblers, bottles), the adhesive edges are most vulnerable — hand wash recommended over dishwashers, which break down the B film adhesive with heat and detergent chemistry over time.
What is the correct lamination pressure for UV DTF AB film?
Medium roller pressure on a cold laminator. Feed slowly and evenly. After lamination, inspect for bubbles under angled light. If bubbles are present, run through again at slightly higher pressure. Allow 5–10 minutes rest after lamination before cutting, to allow the B film adhesive to fully contact the ink surface.
Does SHL Supply offer UV DTF AB film with better adhesion for problem substrates?
Yes. SHL UV DTF AB Film is stocked in our Los Angeles warehouse in 12" and 24" widths, available for same or next-day shipping. Our B film features high-strength adhesive for glass, ceramic, metal, plastic, leather, and wood, with no residue upon removal. Contact 562-203-5165 for substrate-specific guidance.
Fix UV DTF Adhesion — Get the Right AB Film, Ship Today
UV DTF crystal label adhesion failures are almost always fixable — usually with a combination of proper IPA surface prep, correct UV cure power, and high-quality AB film. SHL Supply has the materials you need in Los Angeles stock, with the technical expertise to help you get production right the first time.
Your UV DTF production stack from SHL Supply:
- 🎞️ SHL UV DTF AB Film Roll (24" × 328ft, 2-roll set) →
High-strength adhesive B film · No residue removal · Glass, ceramic, metal, plastic compatible · In-stock LA - 🖨️ SHL 24-Inch UV DTF Printer with Foil Attachment →
3× Epson i3200-U1 · CMYK+W+V+Gold Foil · Integrated lamination · PhotoPrint RIP - 🖨️ SHL A3 Multi-Function UV Printer →
UV flatbed + UV DTF + bottle printing · DX7 printhead · Desktop size · LA-based support - 🔧 SHL Printer Maintenance Kit →
5 solutions for printhead care and cleaning
📍 SHL LA Supply
12155 Mora Dr, Santa Fe Springs, CA 90670
📞 562-203-5165 · ✉️ info@shl-supply.com
Mon–Fri 9 AM–5 PM PST · Same/next-day shipping · In-person training · US-based support

Leave a comment
This site is protected by hCaptcha and the hCaptcha Privacy Policy and Terms of Service apply.