
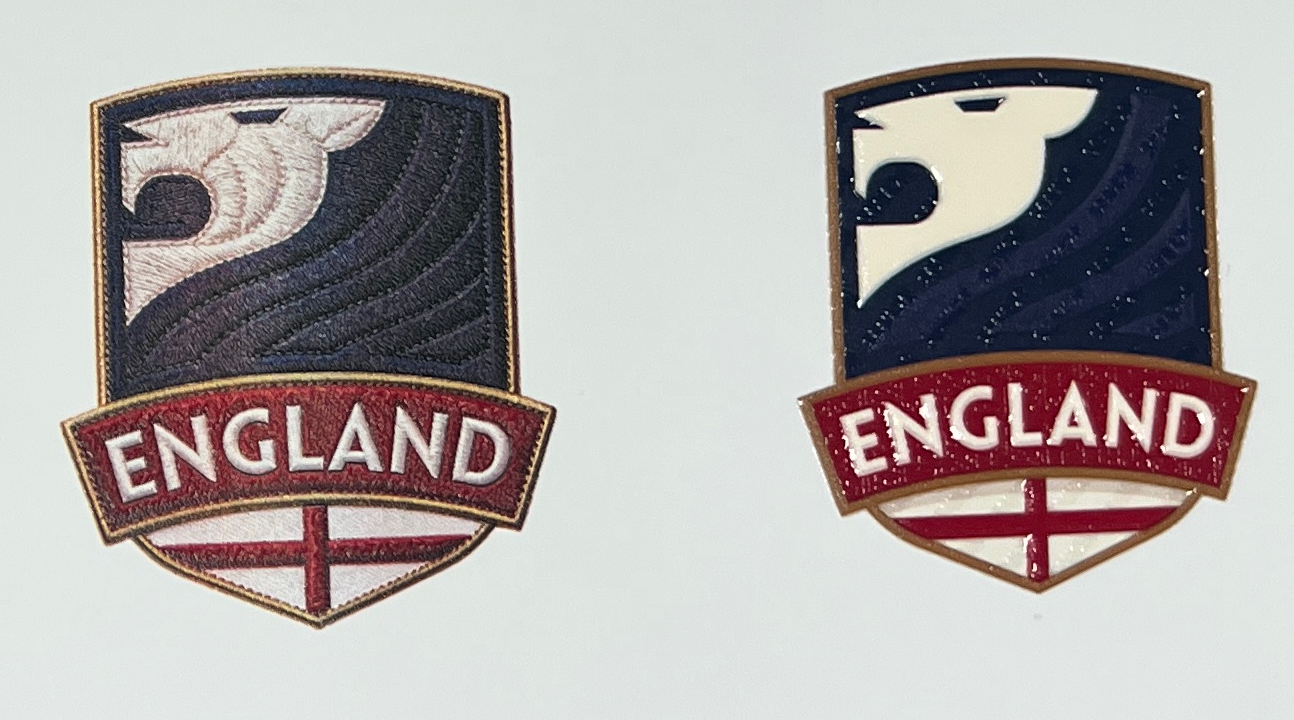
If you've held a modern sportswear jersey, a streetwear hoodie, or a branded cap in the last couple of years, there's a good chance you've touched a TPU (Thermoplastic Polyurethane) patch without realizing it. These soft, raised, glossy emblems have quietly replaced a lot of stiff PVC patches and slow, expensive embroidery — and the technology behind them, UV DTF printing on specialty TPU film, is now accessible to any print shop with the right printer and film.
This guide walks through exactly how raised glossy TPU patches and embroidery-textured emblems are made, from artwork to heat press, including the film specs, ink layering technique, and settings that actually produce a clean, durable result. We'll also cover how to dial in the "faux embroidery" look customers keep asking for, with production data referenced from SHL Supply, a US-based UV DTF and TPU film supplier.
Quick answer: Raised glossy TPU patches are made by printing multiple passes of white UV ink onto 3D TPU transfer film to build height, printing CMYK color on top, sealing with a gloss or matte varnish, contour-cutting the design, then heat pressing it onto fabric at 140–160°C (300–320°F) for 10–15 seconds. The number of white-ink passes (4x, 6x, 10x) controls raise height; the varnish choice controls whether it looks glossy/PVC-like or matte/embroidery-like.
Table of Contents
- What Are TPU Raised Glossy Patches, Exactly?
- Why TPU Film Instead of PVC or Embroidery?
- Equipment and Materials You'll Need
- Step-by-Step: How to Make a Raised Glossy TPU Patch
- How to Create the Embroidery-Textured Look
- Glossy vs. Matte: Choosing the Right Varnish
- TPU Patches vs. Embroidery vs. PVC vs. Silicone
- Common Mistakes to Avoid
- Where TPU Raised Glossy Patches Are Used
- FAQ
What Are TPU Raised Glossy Patches, Exactly?
A TPU patch is not printed flat like a standard DTF (Direct-to-Film) transfer. Instead, it's built up in physical layers of UV-cured ink on a flexible polyurethane film, so the finished logo has real height and a tactile surface — you can feel the edges and contours with your finger, the same way you'd feel a stitched embroidery patch or a puffed silicone badge. Once cured, the design is contour-cut and heat-pressed onto fabric like any other heat transfer.
The result sits in an interesting middle ground between three older methods:
- Embroidery — durable and textured, but slow, expensive per unit, and limited in fine detail or color gradients.
- PVC/rubber patches — durable and glossy, but stiff, heavy, and require expensive molds with long lead times.
- Standard flat DTF/vinyl — cheap and fast, but flat, and reads as "low effort" on premium apparel.
TPU film splits the difference: it's soft and flexible like embroidery, glossy and dimensional like PVC, and as fast and mold-free as standard digital printing.
Why TPU Film Instead of PVC or Embroidery?
Before getting into the process, it's worth understanding what makes the TPU substrate itself different, because the material is the reason this technique works at all.
Commercial-grade 3D UV DTF TPU film — such as SHL Supply's 3D TPU heat transfer film — is typically built as a 300µm TPU printing layer laminated to a 100µm PVC release liner. That thickness matters for two reasons:
- It's thick enough to hold ink layers. Multiple passes of white UV ink can be stacked on top of it to build real embossed height without the film itself warping or curling.
- It stretches instead of cracking. TPU flexes roughly 5–20% with the fabric it's pressed onto, so the patch moves with a jersey or hoodie sleeve instead of splitting at the seams the way rigid PVC does after repeated washing.
Most TPU film for this application is rated for Level 3 wash durability, meaning 50+ industrial or home wash cycles without cracking, peeling, or fading, provided the garment is washed inside-out. It's also available in several base finishes — white, silver, gold, holographic, glitter, glow-in-dark, and matte — which is what allows the embroidery-textured and raised glossy effects described below.
Equipment and Materials You'll Need
To produce TPU raised glossy patches in-house, you need:
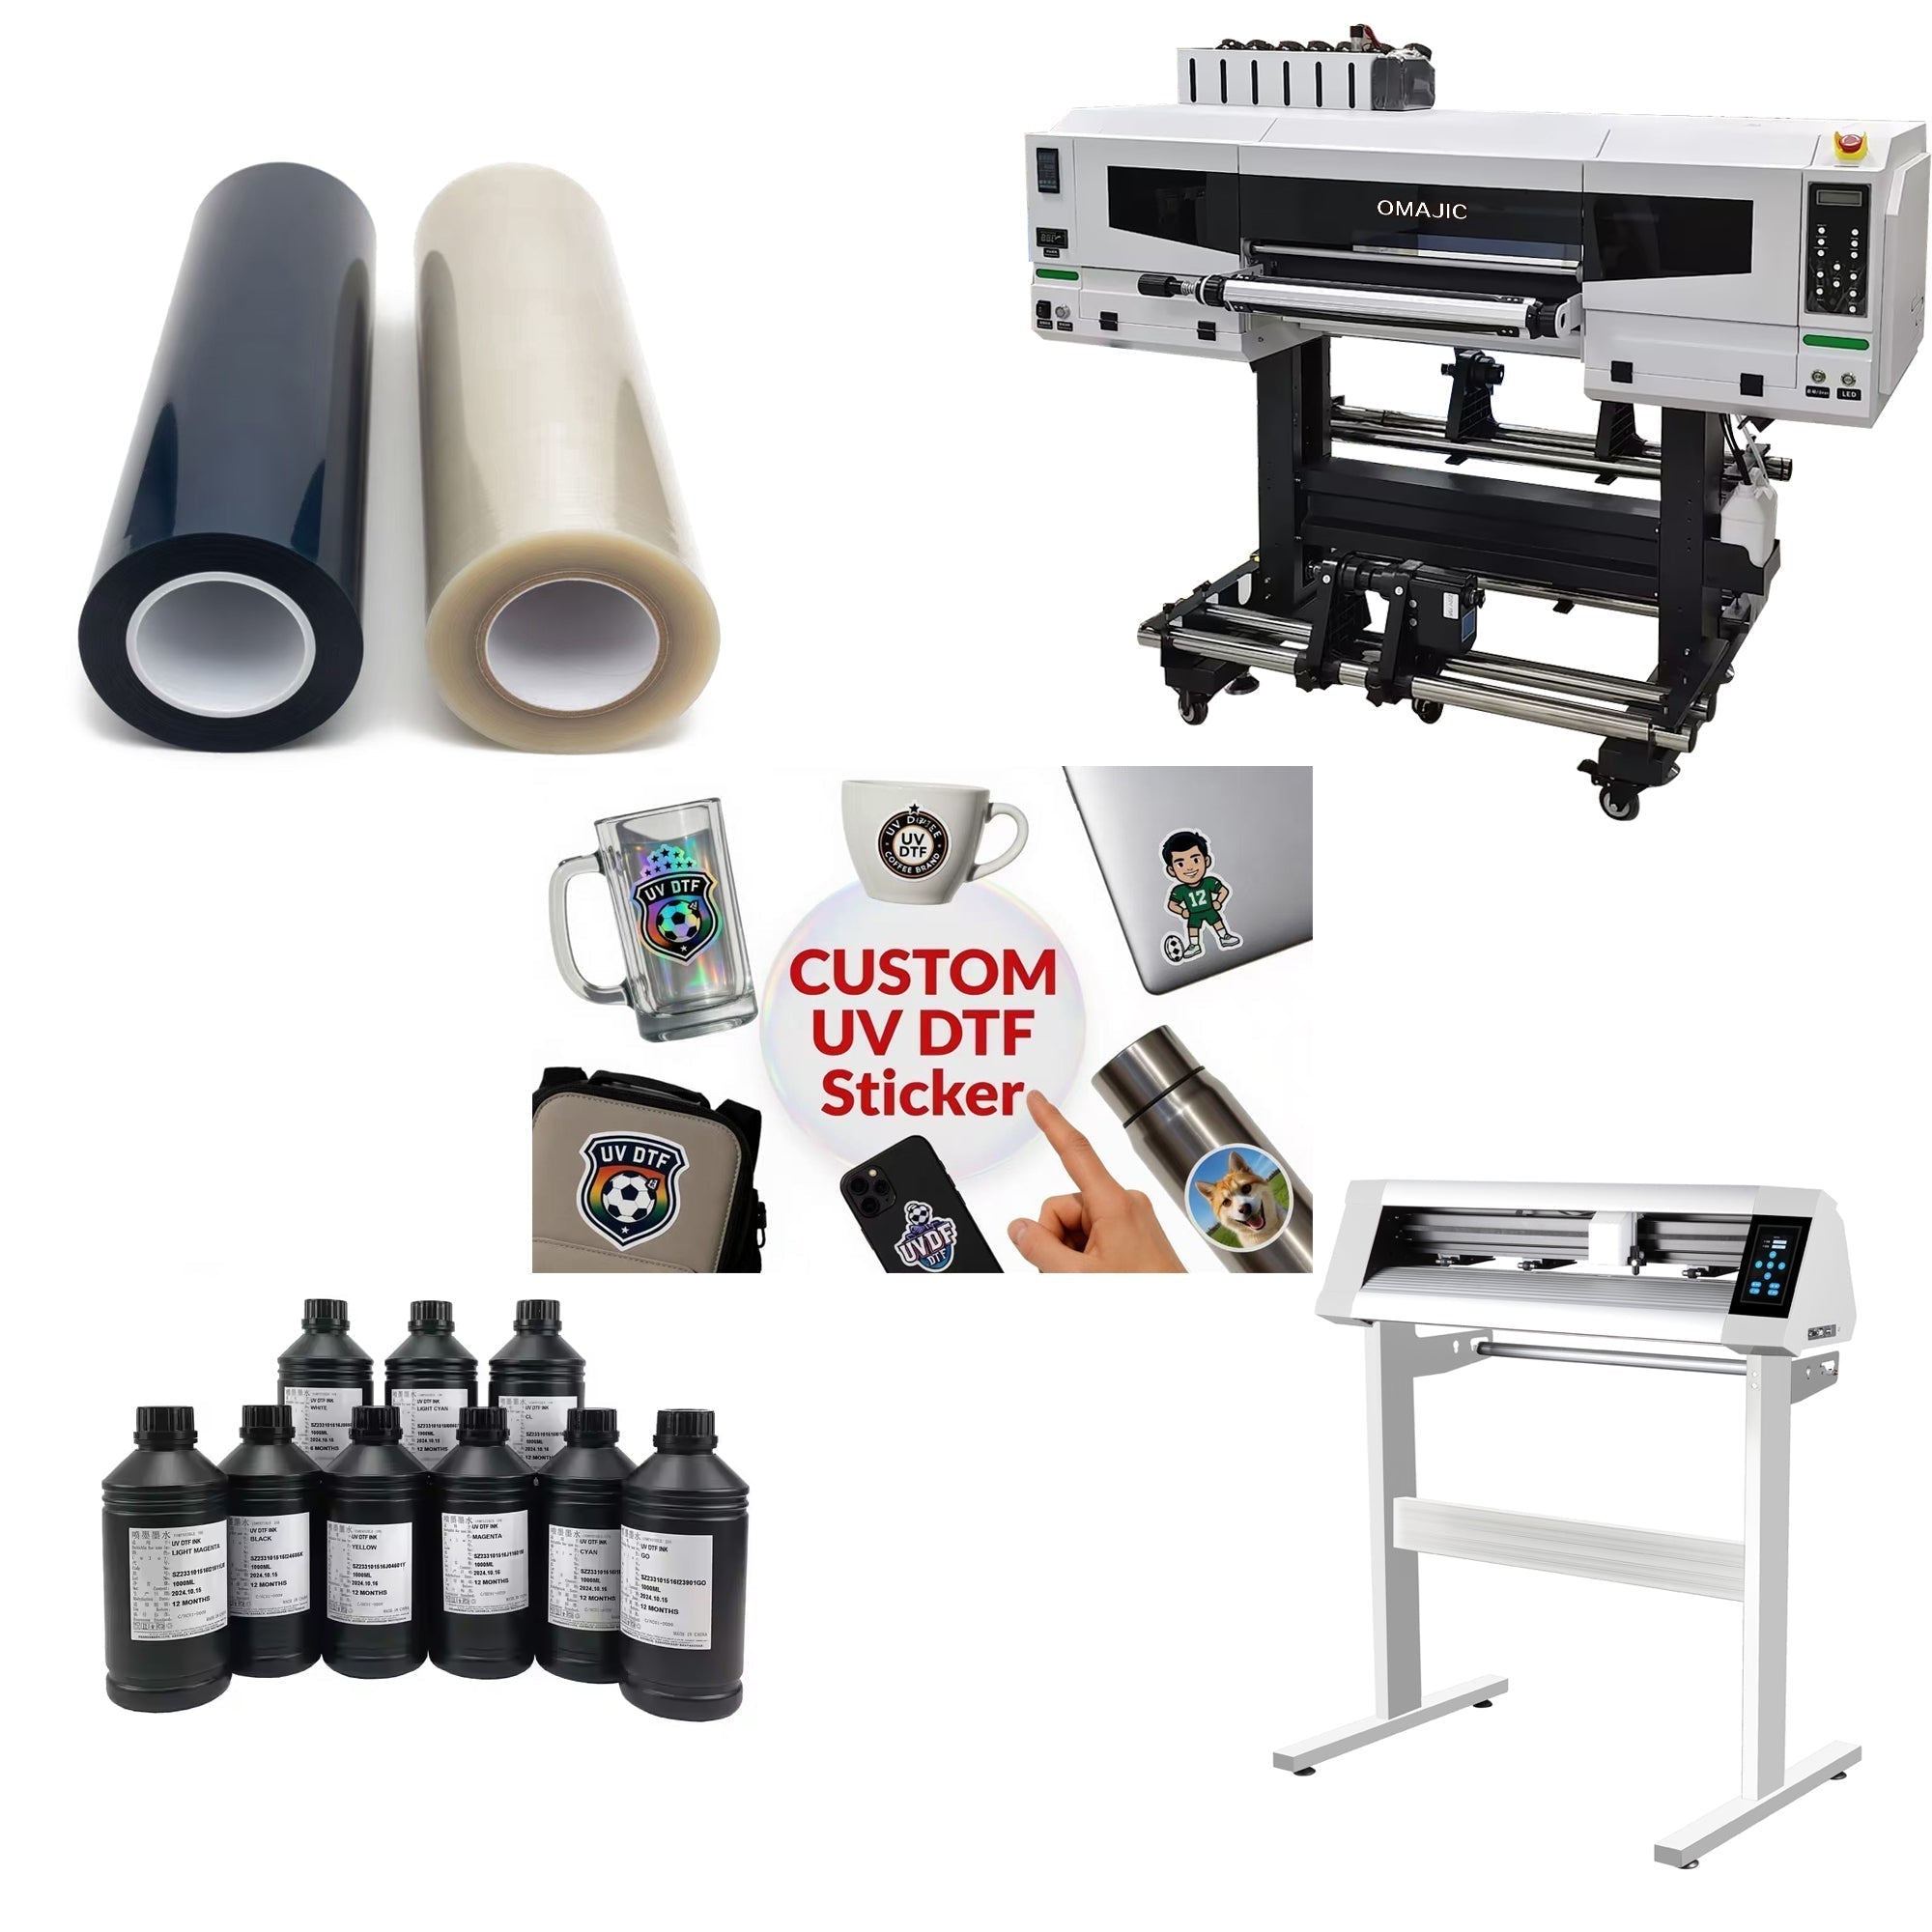
- A UV DTF printer with white, CMYK, and varnish channels — most commercial setups use Epson i3200-U1 or Ricoh GH2220 printheads, capable of printing white, color, and gloss/matte varnish in a single pass sequence.
- Specialty 3D TPU transfer film, sold in rolls (commonly 12" or 24" wide) or precut sheets, with the PVC release layer already laminated on.
- RIP (Raster Image Processor) software that lets you set multiple white-ink pass counts on specific layers of your design.
- A vinyl or laser cutting plotter for contour-cutting the finished patches.
- A heat press (flat or clamshell) capable of holding a steady 140–160°C.
- Vector design software (Illustrator, CorelDRAW, or similar) to separate your artwork into white/base, color, and texture layers.
Step-by-Step: How to Make a Raised Glossy TPU Patch
Step 1: Prepare Your Artwork
Build your design as a vector file at a minimum of 300 DPI. Separate the file into distinct layers: one for the areas that should be raised (the white ink base), one for the CMYK color fill, and, if you want an embroidery look, a texture/stitch layer (more on this below). Keep fine lines above roughly 1–1.5mm wide — anything thinner tends to lose definition once ink is stacked several layers high.
Step 2: Load the TPU Film and Set Pass Counts
Load the TPU film into the printer with the printable (TPU) side facing up, and run a nozzle check before production. In your RIP software, assign a white-ink pass count to the areas you want raised. This pass count directly controls how much the finished patch stands up off the fabric:
| Pass Count | Resulting Effect | Typical Use |
|---|---|---|
| 4x | Subtle, light texture | Small text, fine detail logos |
| 6x | Medium embossing (most common) | Standard logo patches, jersey numbers |
| 10x | Pronounced, high-relief 3D effect | Bold mascots, statement emblems, badges |
Step 3: Print the White Base, Then Color, Then Varnish
The printer lays down the white ink first to build the raised foundation, then prints the CMYK color layer on top, and finishes with a clear varnish pass. The varnish isn't just cosmetic — it seals the ink, adds scratch resistance, and is where you choose between a high-gloss finish (for that shiny, PVC-like look) or a matte finish (for a softer, more embroidery-like surface). Some printers also support a gold or metallic varnish pass for foil-style accents.
Step 4: Contour-Cut the Patches
Once the ink and varnish are UV-cured, send the file to a vinyl cutter or laser cutter to trim precisely around the outer edge of each design. Good registration between the printed layers and the cut line is what separates a clean, professional patch from one with visible white halos at the edge.
Step 5: Heat Press onto the Garment
Peel away the excess film around the cut patch, position it on the fabric, and press:
- Temperature: 140–160°C (300–320°F)
- Time: 10–15 seconds (extend to 15–20 seconds on thicker or structured items like caps)
- Pressure: Firm, even, medium-to-high
Peel the PVC release liner off while the patch is still warm — this is what allows the edges to bond cleanly instead of lifting.
Step 6: Quality Check
Inspect for even embossing height across the design, fully sealed edges, and no visible lifting at corners. A properly pressed TPU patch should survive a light tug test at the edges without peeling.
How to Create the Embroidery-Textured Look
A lot of buyers specifically want a patch that reads as embroidery from a few feet away, without the cost or turnaround time of actual stitching. This is achieved entirely through design and ink layering — no thread involved:
- Simulate stitch direction in your vector file. Instead of a single flat color fill, break your design into narrow parallel bands or curved fill lines that mimic satin stitch, chain stitch, or cross-stitch patterns, similar to how embroidery digitizing software maps stitch angles.
- Use the white ink layer to create ridges, not just a flat plateau. Rather than one uniform raised block, vary the white-ink pass count slightly between adjacent "stitch lines" so light catches the surface unevenly, the same way real thread creates micro-shadows.
- Choose a matte or semi-gloss varnish rather than full gloss. A high-gloss finish reads as "rubber patch"; a matte or satin varnish scatters light more like natural thread fiber and sells the embroidery illusion.
- Keep color transitions on stitch boundaries, not mid-shape, so each "thread line" in the CMYK layer stays a single flat color — this mirrors how multi-color embroidery is actually built one thread color at a time.
Done well, this faux-embroidery TPU technique gives you the tactile depth and premium look of stitching, but with photo-realistic gradients, tiny text, and full-color artwork that would be impossible or extremely costly to embroider.
Glossy vs. Matte: Choosing the Right Varnish
| Finish | Look & Feel | Best For |
|---|---|---|
| High Gloss | Shiny, reflective, rubber/PVC-like | Sports logos, bold brand marks, bag tags |
| Matte | Soft, diffused light, fabric-like | Embroidery-style emblems, minimalist logos |
| Metallic/Foil | Gold or silver reflective accents | Premium branding, awards, badges |
| Holographic | Color-shifting shimmer | Fashion-forward and streetwear drops |
TPU Patches vs. Embroidery vs. PVC vs. Silicone
| Method | Texture | Flexibility | Setup Cost | Lead Time | Detail Level |
|---|---|---|---|---|---|
| TPU (UV DTF) | Raised, glossy or matte | High — stretches with fabric | Low, no molds | Same/next day | Photo-realistic, gradients |
| Embroidery | Raised, thread texture | Medium | Low–medium (digitizing fee) | Days | Limited fine detail |
| PVC/Rubber | Raised, glossy | Low — can crack | High ($500–$2,000+ molds) | Weeks | Moderate |
| Silicone | Raised, soft | Medium | High (molds) | Weeks | Moderate |
Common Mistakes to Avoid
- Skipping the pass-count test print. Always print a small test swatch to confirm your chosen pass count gives the raise height you want before running a full production batch — humidity and film batch can shift results slightly.
- Pressing too cool or too briefly. Under-pressing is the single biggest cause of edge lifting after the first wash; stay within the 140–160°C / 10–15s window.
- Removing the release liner while the patch is cold. This is a common cause of poor edge adhesion — always peel warm.
- Using hard/rigid UV ink instead of soft, flex-rated ink. Rigid ink formulations crack when the TPU stretches; confirm your ink is rated for flexible substrates.
- Ignoring wash instructions. Even Level 3-rated patches last longer when garments are washed inside-out on a cold or warm (not hot) cycle.
Where TPU Raised Glossy Patches Are Used
This technique has become the go-to for jersey and cap branding, streetwear hoodie tags, backpacks and bags, corporate uniforms, and promotional merchandise — anywhere a brand wants the premium, tactile feel of embroidery or a woven label without the per-unit cost, minimum order quantities, or multi-week production timelines.
FAQ
What temperature should I use to heat press a TPU patch?
Most 3D TPU film is designed for 140–160°C (300–320°F) for 10–15 seconds with firm, even pressure. Thicker or structured items like caps may need slightly longer, around 15–20 seconds.
How many wash cycles can a TPU patch survive?
Film rated Level 3 for wash durability is typically tested for 50+ industrial wash cycles without cracking, peeling, or noticeable fading, assuming the garment is washed inside-out.
Can a TPU patch really look like embroidery?
Yes. By combining stitch-direction artwork, varied white-ink pass counts for ridge texture, and a matte or satin varnish instead of high gloss, TPU patches can closely mimic the visual and tactile qualities of embroidery — with the added benefit of full-color gradients and fine detail that thread can't reproduce.
Do I need a special printer to make TPU patches?
You need a UV DTF printer with separate white, CMYK, and varnish ink channels and multi-pass capability in the RIP software. Most modern UV DTF printers designed for TPU film, including those using Epson i3200-U1 or Ricoh GH2220 printheads, support this workflow.
What's the difference between glossy and matte TPU patches?
Glossy varnish produces a shiny, rubber/PVC-like surface best suited to bold sports and brand logos. Matte varnish diffuses light more like natural fabric or thread, which is why it's the better choice when you're trying to replicate an embroidery look.
Final Thoughts
Raised glossy TPU patches and embroidery-textured emblems come down to three controllable variables: how many passes of white ink you stack to build height, which varnish finish you choose to control light reflection, and how precisely your artwork simulates real stitch direction. Get those three right, and a UV DTF printer with the correct TPU film can produce patches that rival embroidery and PVC in look and durability — at a fraction of the cost and lead time.
Ready to start producing 3D TPU patches?
SHL Supply stocks 3D UV DTF TPU transfer film in multiple finishes and roll sizes, plus UV DTF printers and technical guidance for shops getting started with 3D patch production.
Shop 3D TPU Transfer Film

Leave a comment
This site is protected by hCaptcha and the hCaptcha Privacy Policy and Terms of Service apply.